Thursday, 16 July 2015

Embroidery Projects

I finished another Instagram swap.  This time it was for the Canadian Hoop Art Swap.  You could create whatever you wanted (applique, embroidery, etc) as long as it was within a 6 inch hoop.  My partner liked animals and flowers that had a Native American feel to them.  I wanted to practice embroidery (while we finished a tv series).  I decided to make a dream catcher out of the hoop.

The design I picked was a combo of two designs: a fox and a dream catcher. 
I drew the fox in pencil and the dream catcher in water soluble pen so I could keep track.
I quickly got bored with orange, so I decided that the fox was going to be colorful.
For the dream catcher, I decided to make it as realistic as possible so you could tell what it was.
I got bored with brown.  I decided beads would look nice.  A trip to Michaels was in the works!
I really like how the beads turned out.  Next was to make feathers for the dream catcher.  I wanted to make them more whimsical to match my flashy fox.  I decided to go with Kaffe Fassett fabric.   I ironed to pieces together with fusible webbing and then cut out a feather shape.  I then stitched them together.  Hind sight... should have stitched them THEN cut them.  Oh well.
I made the string out of brown fabric.  I learned from the feathers and stitched lines 1/4 apart and then cut them out with a rotary cutter.  To attach them, I strung up a bead (this was not easy) and then hot glued it in.

Before I put the embroidery in the hoop, I painted the hoop to look like it was wrapped with leather.
Here's the finished product!
My husband then asked me to make him an embroidered rose for his linen shirt.  He's been bugging me for years and said, "you're making things for strangers but not for me <insert pouty face>"
Here's the rose I did for him.

It still needs to be washed.  Crossing fingers and toes it doesn't bleed!


Tuesday, 7 July 2015

Birds on a wire

I signed up for a mini swap with the Ottawa Modern Quilt Guild.  The theme was modern.  I wanted to create something simple to focus on the quilting.  I decided to create birds on a wire. 
I drew out 6 birds on fusible webbing and ironed them onto fabric.  I decided to go with solids because I normally do patterns and I wanted a change.  I couldn't resist making one fancy bird though.  I cut out the birds and looked for the best placement.  For the wire, I used a clover bias tape maker (1/4 inch finished).  It was the first time I tried using it and I loved it.

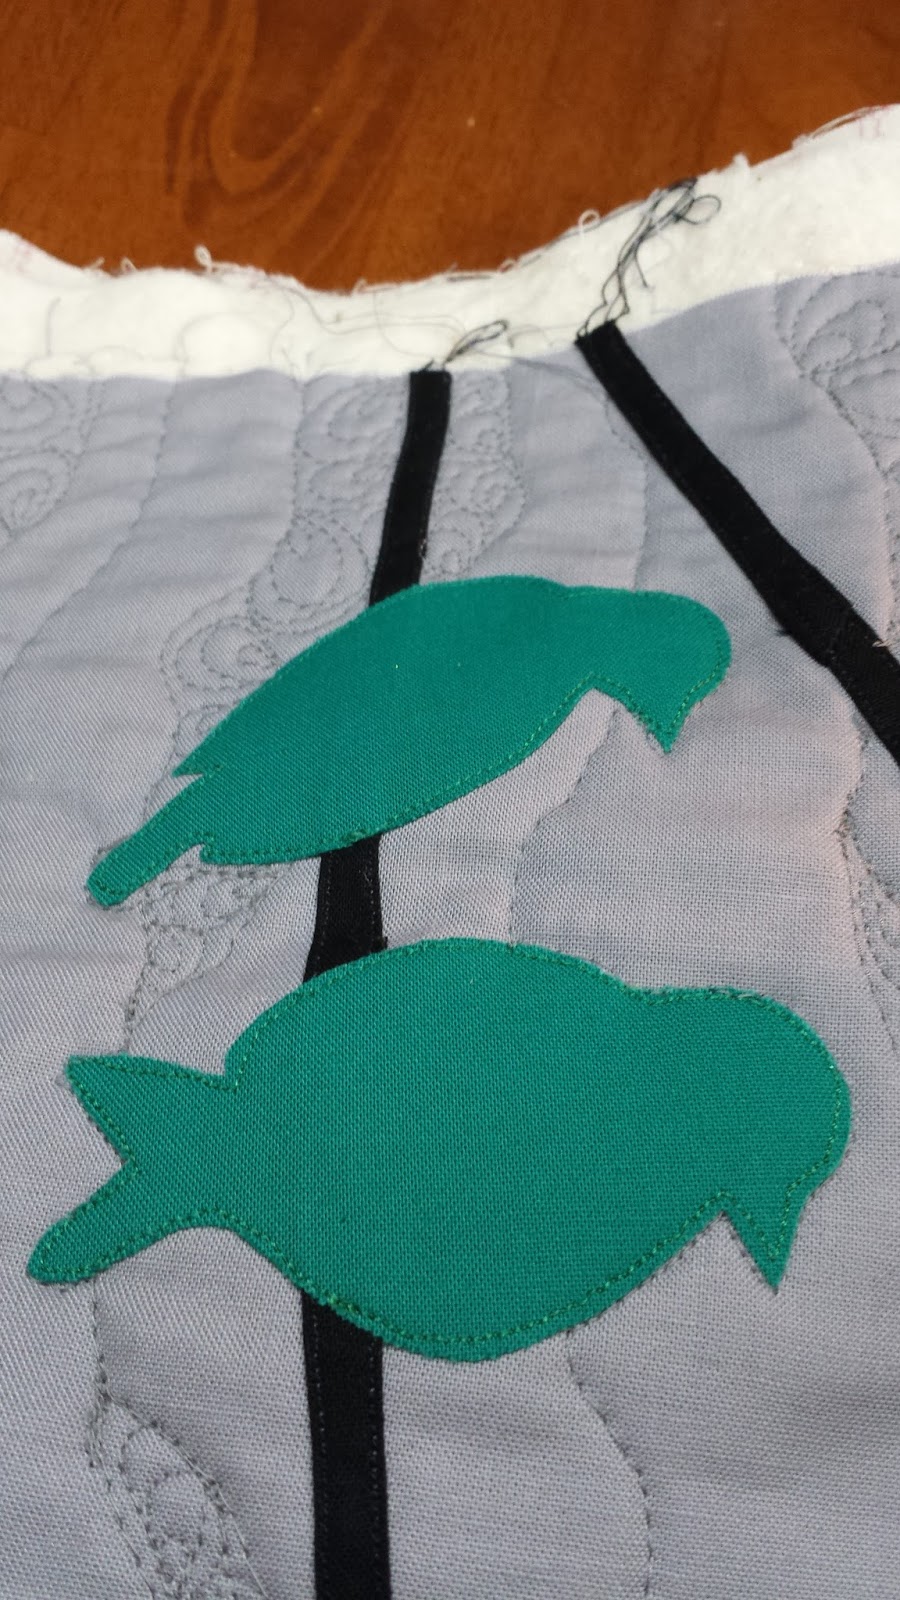
Here's a close shot of the birds sewn on.  I used a straight stitch because I wanted it to be hidden.  Since it's a mini quilt I wasn't worried about fraying.
For the quilting I wanted it to look like moving clouds in the background so I decided to go with wavy lines filled randomly with paisley swirly thingys. Once done quilting I decided to try out hidden binding.  It was an easy tutorial I found online and I think it makes the piece read more like a canvas than a quilt.

Here's the finished product!


Sunday, 5 July 2015

Yellow Lab

I signed up for my first instagram swap, which was dog themed. With an instagram swap, you basically fill out a form with what you like/don't like, the organizer assigns a person to you and hands you their form.  You make them a mini quilt and receive one from a stranger.

My partner had a yellow lab and used a collage of pictures of him as my inspiration.  I knew I needed to do a yellow lab, but I didn't want to use all yellow.

I started with the background making equilateral triangles.
For the dog, I found a grey scale drawing of a dog I liked, so i printed him out.  I placed the picture in a clear page protector sleeve and drew him out with sharpies.  The darkest value I assigned blue, medium was red, and light was yellow. Once drawn out, I used a old classroom projector (I bought at an auction) and projected it on the wall.  I traced each piece out on fusible webbing, and ironed them onto the background fabric.


Once ironed down, I sewed each piece down with coordinating thread,  I quilted the piece with simple triangles.
For the back, I added a paw print as the label.  I blurred out the name (just in case).
Hope she loves it!!!


Monday, 26 January 2015

Embroidery and Piping

I'm very proud of the embroidered chicken I made for my mom.  I'm getting better at learning how to keep my stitches from stretching the fabric.
 Although I think the chicken is totally cute... my grandmother's work still kicks it's butt!  When I was in Houston in October she ended up giving me a beautiful peacock embroidery.  This weekend I decided to turn it into a pillow for my bed.

When I bought the fabric for the pillow I had originally decided to make two borders: a small blue border and a design border. The peacock was so large though, that I decided (with my friend Ali's help) that the design border should really just be piping.... so it was time to learn how to make piping!
Here's the result!!!


I love the back fabric so much!  I have a lot extra and my plan is to make two smaller pillows out of it for my bed! 

Christmas Skirt

I'm finally getting around to posting my Christmas tree skirts.  I made 3 this year.  That's right 3!  Never again!

I realized after starting this project that I #1 hated Christmas fabric, and #2 procrastinate when I hate a type of fabric.  Overall, I am pleased with how they turned out and glad I made them.

The first part of the project was cutting strips.  I had to cut 80 strips per skirt.  That's 240 strips total. 
I then sewed them into blocks of 10 before I started cutting!
Cutting strips and sewing them together took the longest (I started in Feb... took a LONG break from it and finished in October).
Once all the strips were cut, I then made a template out of freezer paper and began cutting them into the right shape.

I used the same freezer paper method with the border fabric. 
Don't ya just love sewing circles?  I had to sew 24 of these bad boys!
Here's what the panels looked like sewed together.
Once I laid out the panels where I wanted them.  I then cut out 16 holly leaves (48 total) and 16 berries per skirt.  I ironed these puppies on and then did a zig-zag stitch around them so they didn't frey.  After that I sewed the panels together and made my sandwich!

Machine quilting is my favorite part.  I did holly leaves on one, swirls on the second one, and snow flakes on the last one. Here's a look at a finished skirt!


I finished the first two before Christmas.  Mine came after.  Such is life!


Wednesday, 3 December 2014

Zelda Quilt

I created a Zelda themed quilt for a friend I've known since kindergarten using the design from http://quiltingonawhim.blogspot.com.br/2013/05/finished-collaboration-mother-son.html.

We grew up playing it on Nintendo and I wanted this quilt to be special.
I started out making half square triangles.
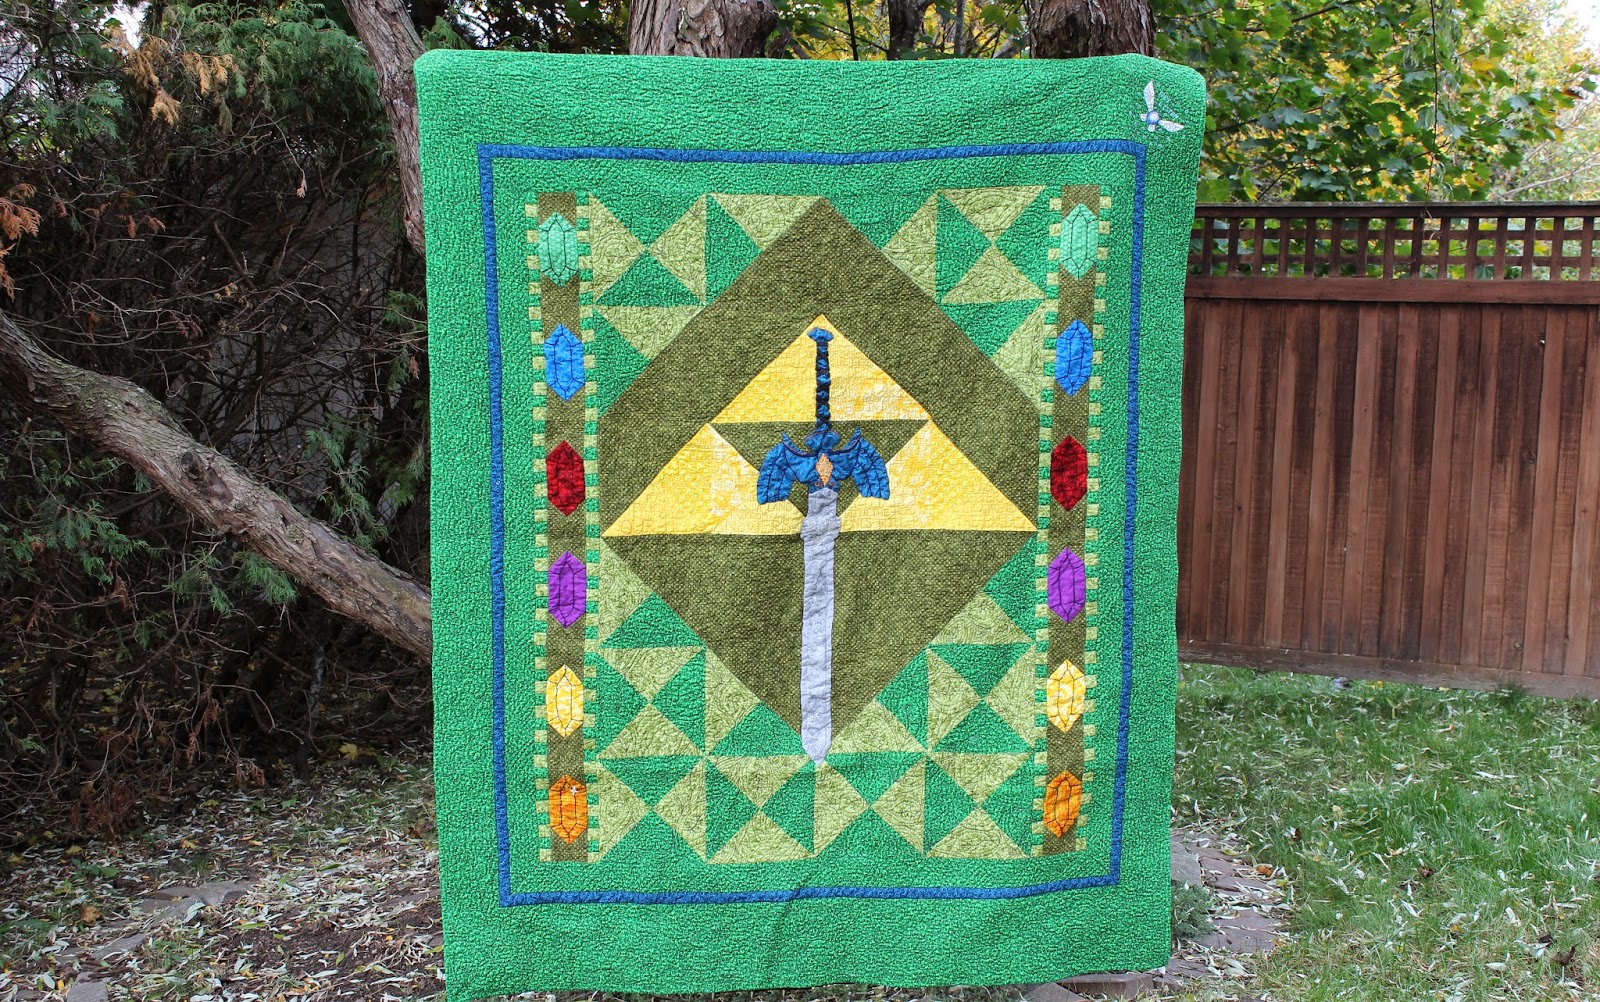
I then sewed them together to make hourglass blocks.  I placed the hourglass blocks into Zelda's triforce symbol.

 I wanted to make the "master" sword for the center so I started my applique.


First I appliqued the blade of the sword.  To make it look 3-D I added a second layer of applique to the sword. Next I started on the handle. I find using starch and freezer paper is the easiest method for me when it comes to applique.
Here's the sword put together on the quilt.


Next I started adding embroidered details.  I also appliqued on straps around the hilt of the sword for more detail, but I forgot to take a progress shot.


I then started on the border.  I made rupees (the money in the game) by using hourglass blocks to make the points and squares to create them. I also cut up strips of the dark and light green to make a "pixel" border around the rupees.  I reused leftover fabric so I had limited amounts of strips I could make.


Here's the top with the added rupee border.

 I added a small blue border and another green border. I also added more embroidery to the rupees.

Once the top was finished, I started quilting it.  I wanted to put the game's legend in the triforce.  I drew out the words on freezer paper to get the spacing right and then transferred it onto the triforce. Quilting the words was not fun, but it does look nice.


Here is the finished quilting in the triforce:


I quilted the rest of the quilt with leaves, triangles, and swirls.

I wanted to add one extra detail, so I decided at the last minute to add Navi the fairy.  She's basically a big blue ball with wings.
I then quilted in her lines from the game.  All she says is "Hey" and "Listen".

For the back, I decided to do a name-tag that looks like the life hearts in the game. I embroidered "It's dangerous to go alone. Take this." as it's a famous quote from the game.
Here is the finished project! Hope you enjoy it.